loader
0 0.00

Shopping Cart ( 0 )

Your Have 0 Item In Your Cart

close

No products in the cart.

Yazar: KaryonX

2Ekim 2025

7 Effective Methods for Sterilizing Laboratory Consumables

Sterility is one of the most critical aspects of laboratory work. Whether in microbiology, molecular biology, or clinical diagnostics, using non-sterile consumables can compromise results, damage cultures, or even create safety risks. Consumables such as pipette tips, Petri dishes, test tubes, and microcentrifuge tubes often come pre-sterilized from manufacturers, but in many cases, labs need to sterilize consumables on-site to ensure compliance and reproducibility.

In this article, we’ll explore 7 effective methods for sterilizing laboratory consumables, their applications, and the precautions to take.


1. Autoclaving (Steam Sterilization)

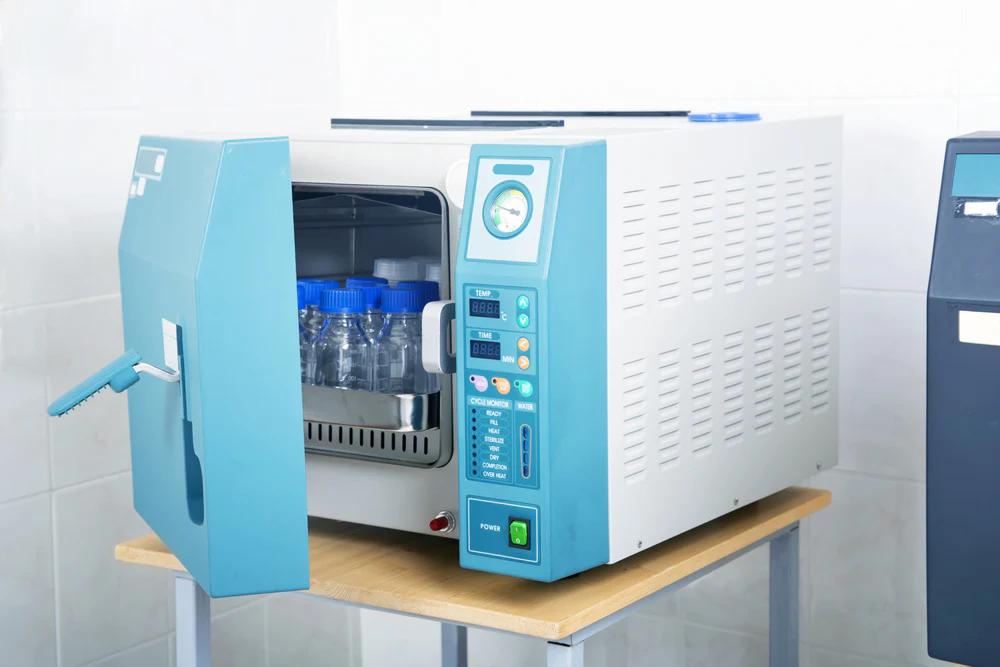
Autoclaving is the most widely used sterilization method in laboratories. It uses pressurized steam at 121°C for 15–20 minutes to destroy microorganisms, spores, and contaminants.

  • Suitable for: glassware, metal instruments, certain plastic consumables (if autoclavable).
  • Not suitable for: heat-sensitive plastics, some reagents.
  • Benefits: reliable, fast, widely accessible.
  • Precaution: ensure consumables are marked “autoclavable” to prevent melting or deformation.

Autoclaving is the gold standard for sterilization, especially for glass test tubes, flasks, and reusable lab consumables.


2. Dry Heat Sterilization

Unlike autoclaving, dry heat uses high temperatures (160–180°C) for 2–3 hours without moisture. It kills microorganisms through oxidative processes.

  • Suitable for: glassware, metal tools, powders.
  • Not suitable for: plastics, liquids, or heat-sensitive materials.
  • Benefits: effective for materials damaged by moisture.
  • Precaution: longer cycle times and energy consumption.

Dry heat sterilization is commonly used for Petri dishes, glass pipettes, and glass slides.


3. Chemical Sterilization

Some consumables cannot withstand heat, so chemical sterilants such as ethylene oxide (EtO), hydrogen peroxide, or peracetic acid are used.

  • Suitable for: plastics, catheters, disposable syringes, and medical consumables.
  • Not suitable for: reagents or materials reactive to chemicals.
  • Benefits: effective at low temperatures, penetrates packaging.
  • Precaution: EtO is toxic and requires long aeration times.

Chemical sterilization is widely used in industrial-scale sterilization of consumables like pipette tips and plastic Petri dishes.


4. Radiation Sterilization (Gamma or Electron Beam)

Radiation sterilization uses gamma rays or electron beams to destroy microorganisms by damaging their DNA.

  • Suitable for: single-use plastics (Petri dishes, pipette tips, syringes).
  • Benefits: rapid, effective, leaves no residue.
  • Precaution: requires specialized equipment, not feasible for in-house labs.

Most commercially pre-sterilized consumables (like disposable pipette tips) are treated with gamma radiation.


5. Filtration Sterilization

This method uses membrane filters with pore sizes ≤0.22 µm to physically remove bacteria and other contaminants from liquids.

  • Suitable for: culture media, buffers, heat-sensitive reagents.
  • Not suitable for: solid consumables.
  • Benefits: preserves the activity of heat-sensitive solutions.
  • Precaution: does not remove viruses or prions.

Filtration is essential for sterilizing lab reagents and solutions before use in experiments.


6. UV Sterilization

Ultraviolet (UV-C) light at 254 nm can sterilize surfaces and air in laboratories.

  • Suitable for: workbench surfaces, plastic consumables (surface sterilization only).
  • Benefits: quick, chemical-free.
  • Precaution: limited penetration, only works on exposed surfaces.

UV sterilization is often used in biosafety cabinets and laminar flow hoods to maintain sterility of consumables before use.


7. Gas Plasma Sterilization

This advanced method uses low-temperature hydrogen peroxide plasma to sterilize consumables.

  • Suitable for: heat-sensitive plastics, medical instruments, optical devices.
  • Benefits: rapid, non-toxic residue, effective at low temperatures.
  • Precaution: expensive, requires specialized equipment.

Gas plasma sterilization is increasingly used in hospitals and biotech labs for sensitive consumables that cannot be autoclaved.


Best Practices for Sterilizing Consumables

  • Labeling: Always mark sterilized consumables with date and cycle.
  • Validation: Use sterility indicators (autoclave tape, biological indicators) to confirm successful sterilization.
  • Storage: Keep sterilized items in sealed pouches or sterile cabinets to avoid contamination.
  • Supplier Choice: When possible, purchase consumables pre-sterilized from ISO-certified suppliers.

Conclusion

Sterilization of laboratory consumables is not optional—it is essential for ensuring reliable results, researcher safety, and compliance with international standards. By applying the correct sterilization method—whether autoclaving, dry heat, chemicals, radiation, filtration, UV, or gas plasma—labs can guarantee that their tools and consumables remain contamination-free.

Choosing the right sterilization approach depends on the type of consumable, material properties, and laboratory capacity. A trusted bio solutions partner, such as KaryonX, ensures access to both sterilized consumables and expert guidance on best practices for sterility in scientific environments.

More Articles

2Ekim 2025

5 Scientific Reasons Why Microcentrifuge Tubes Shatter in the Centrifuge

Microcentrifuge tubes are essential consumables in molecular biology, biochemistry, and clinical diagnostics. They are designed to withstand extreme centrifugal forces, but sometimes researchers experience a frustrating (and dangerous) issue: tubes shattering inside the centrifuge. This not only damages valuable samples but can also harm the equipment and compromise results.

In this article, we’ll break down the top 5 scientific reasons why microcentrifuge tubes shatter in centrifugation and explain how to prevent it.


1. Rotor Imbalance and Uneven Loading

One of the most common causes of tube failure in a centrifuge is imbalance. If the rotor is not evenly loaded with tubes of equal weight and volume, the centrifugal force is distributed unevenly. This creates excessive stress on one side of the rotor and can lead to tube cracking or complete shattering.

  • Always balance tubes by placing them opposite each other in the rotor.
  • Ensure liquid volumes are equal to prevent weight discrepancies.
  • For odd numbers of samples, use a balance tube filled with water or buffer.

Imbalance is a mechanical issue that can be prevented with careful loading, making it the first thing to check if tubes keep breaking.


2. Exceeding the Maximum G-Force of the Tube

Every microcentrifuge tube is rated for a maximum centrifugal force (RCF or g-force). Standard polypropylene tubes typically tolerate up to 20,000 × g, while higher-quality ultracentrifuge tubes may withstand 60,000 × g or more.

If the centrifuge is set above the tube’s tolerance, the wall structure cannot withstand the stress and eventually shatters.

  • Always check the manufacturer’s specifications for g-force limits.
  • Do not confuse RPM with RCF (relative centrifugal force)—they are not the same.
  • Use the RCF conversion formula:
    RCF=1.118×10⁻⁵×r×(RPM)2RCF = 1.118 × 10^-5 × r × (RPM)^2RCF=1.118×10⁻⁵×r×(RPM)2
    (where r = radius in cm)

Running tubes beyond their rated tolerance is one of the fastest ways to cause failure.


3. Poor Tube Quality or Manufacturing Defects

Not all microcentrifuge tubes are created equal. Low-grade plastics, thin walls, or poor molding can create weak points that fail under high g-forces. Even a small defect can lead to catastrophic breakage when the rotor reaches full speed.

Signs of poor-quality tubes include:

  • Inconsistent wall thickness
  • Visible seams or bubbles in the plastic
  • Loose or poorly fitting caps

To prevent issues, source tubes from trusted suppliers that comply with ISO and CE standards. Choosing certified, high-quality lab disposables ensures safety, reproducibility, and protection of valuable samples.


4. Temperature Stress and Material Fatigue

Centrifugation often occurs under extreme temperature conditions—such as -20°C for nucleic acid extraction or 4°C for protein stability. Sudden shifts between freezing and high-speed centrifugation can create thermal stress, causing brittle plastic to crack.

In addition, repeated cycles of centrifugation weaken tube material over time, a process known as material fatigue.

Prevention tips:

  • Use refrigerated centrifuges designed for temperature-sensitive applications.
  • Avoid reusing tubes multiple times at high g-forces.
  • Store tubes under recommended conditions to preserve integrity.

5. Incorrect Rotor Type or Improper Tube Fit

Not every tube is designed for every rotor. Using the wrong rotor type (e.g., swinging bucket instead of fixed angle) or forcing a tube into the wrong adapter can create structural stress points.

For example:

  • A 15 mL conical tube in a rotor meant for microtubes may experience uneven pressure.
  • Microtubes that don’t sit flush in the rotor can wobble and shatter.

Always ensure:

  • The tube type matches the rotor specifications.
  • Adapters are used for smaller volumes.
  • Tubes are seated properly before centrifugation begins.

Bonus: Chemical Interactions

Sometimes overlooked, chemicals inside the tube can also weaken plastic. Harsh solvents (e.g., chloroform, phenol, or strong detergents) degrade polypropylene, making it more prone to cracking during centrifugation.


Conclusion

Microcentrifuge tubes are designed to handle extreme stress, but imbalances, excess g-force, poor tube quality, temperature shifts, and rotor mismatches can cause them to fail. By understanding these scientific causes and applying preventive steps, laboratories can protect valuable samples, extend equipment lifespan, and ensure safe centrifugation practices.

When sourcing microcentrifuge tubes, always choose suppliers who comply with ISO, CE, and FDA standards. A small investment in quality products can save thousands in equipment repairs and lost research time.

More Articles

2Ekim 2025

Choosing the 1 Right Company for Your Lab Equipment

Equipping a laboratory is one of the most critical investments for any research center, hospital, or educational institution. The quality and reliability of laboratory equipment directly impact the accuracy of results, the efficiency of workflows, and even the safety of staff. With so many suppliers and manufacturers available, choosing the right company for your lab equipment can feel overwhelming. The decision is not just about buying products—it is about finding a trusted partner who can support your work for years to come.

1. Prioritize Quality and Standards

Laboratory equipment must meet the highest quality standards to ensure reliable and reproducible results. When evaluating a company, ask about international certifications such as ISO, CE, or FDA approvals. Reputable providers will have strict quality control processes and will be transparent about compliance. Choosing equipment that is validated by global standards reduces the risk of inaccurate results, wasted resources, or safety hazards in the lab.

2. Look for a Comprehensive Product Range

A good lab solutions company should offer a wide variety of products, from basic instruments like pipettes and balances to advanced systems such as PCR thermal cyclers, spectrophotometers, and bioreactors. A comprehensive portfolio ensures that you can source everything you need from one reliable provider, saving both time and cost. It also demonstrates the company’s expertise and commitment to supporting diverse research fields, including life sciences, healthcare, biotechnology, and industrial applications.

3. Evaluate Technical Support and Service

Buying equipment is only the beginning. Maintenance, calibration, and technical support are essential to keep instruments running at peak performance. The best lab equipment companies provide after-sales support, training, and servicing options. They understand that downtime can interrupt critical experiments and offer quick solutions to minimize disruption. When choosing a supplier, look for one with a proven record of customer support and accessible service teams.

4. Consider Innovation and Future-Readiness

Science and technology evolve rapidly. The company you select should not only meet today’s needs but also anticipate tomorrow’s challenges. Innovative providers integrate digital solutions, automation, and smart technologies into their product lines, giving your lab the tools to remain competitive and efficient. A partner that invests in research and development demonstrates long-term commitment to the scientific community.

5. Check Reputation and References

Reputation is a strong indicator of trustworthiness. Seek out companies that are already supplying to universities, research institutions, and healthcare facilities. Reviews, testimonials, and referrals can reveal much about the reliability of their products and the professionalism of their team. A brand with global recognition or partnerships with leading institutions is more likely to deliver consistent value.

Conclusion

Choosing the right company for your laboratory equipment is not just a purchasing decision—it is a strategic partnership that influences the success of your work. By focusing on quality, product range, support, innovation, and reputation, you can ensure that your lab is equipped with the best tools for accurate, efficient, and safe scientific outcomes. A reliable bio solutions provider, like KaryonX, helps transform your investment in equipment into meaningful discoveries and long-term growth.

lab